IoT with CircuitPython | Internet connected conference badge

CloudBadge
CircuitPython powered IoT conference Badge
The biggest selling point of CircuitPython to makers is its ease of usage. There is no driver or IDE installation required, just plug in the board, edit and save the “code.py” file inside the drive being mounted and you’re good to go, that’s how simple it is.
This ease of usability and portability also became a small shortcoming sometime back, when it was decided to drop the native support of CircuitPython from maker’s favourite WiFi SoCs, the ESPxx (ESP8266, ESP32) line, because these chips don’t have a native USB support and runs out of RAM quickly if doing both CP and WiFi. No USB mass storage means no uniformity with CircuitPython flashing process, hence the community decided to let go of the support in favour of a uniform programming method across all the supported boards and SoCs.
However, this doesn’t means we cannot do IoT with CircuitPython. Sometimes back adafruit announced support for ESP32 as a co-processor to chips running CircuitPython, that means you can use your main processor (generally SAMD M0/M4 or NRF52) for major project tasks such as driving motors or neopixels and use the ESP32 to off-load WiFi, Encryption and other connection based tasks required to take your board to the world wide web.

I personally love this approach because your main processor can use it’s resources to the max and you don’t have to worry about handling and checking connections, handshakes, cross-compiling SSL libs and generating certificates.
Now there are co-processor boards by adafruit in the form of ESP32 breakouts, airlift feather-wings and a few boards with on-board ESP32 chip such as the PyPortal which you can use to build Edge IoT devices. I have few of airlift feather-wings laying around and I wanted to test it out using MQTT, a Pub-Sub light-weight protocol suitable for IoT. Thankfully CircuitPython has support of easy to use libraries to interface ESP32 and mini-mqtt library to communicate with MQTT brokers. I’ve used MQTT for many projects in the past, I’m sure you’ll find more about it on my previous blogs and google.
I was thinking about a suitable project, when I remember, how fascinated folks always are seeing the PyBadge at local meetups and conferences and often wants to try it for themselves, I thought how cool it would be if we can connect the PyBadge on the conference network or hotspot and use an online dashboard/UI to change name and color of the badge on the go, it would also be great for conference organizers if they ever decide to make a badge for the attendee as they register and later take it back to be reused in next event again. Since the badge also has neopixels LEDs, it would be great to have a RGB color picker and let the user pick a badge color for themselves.
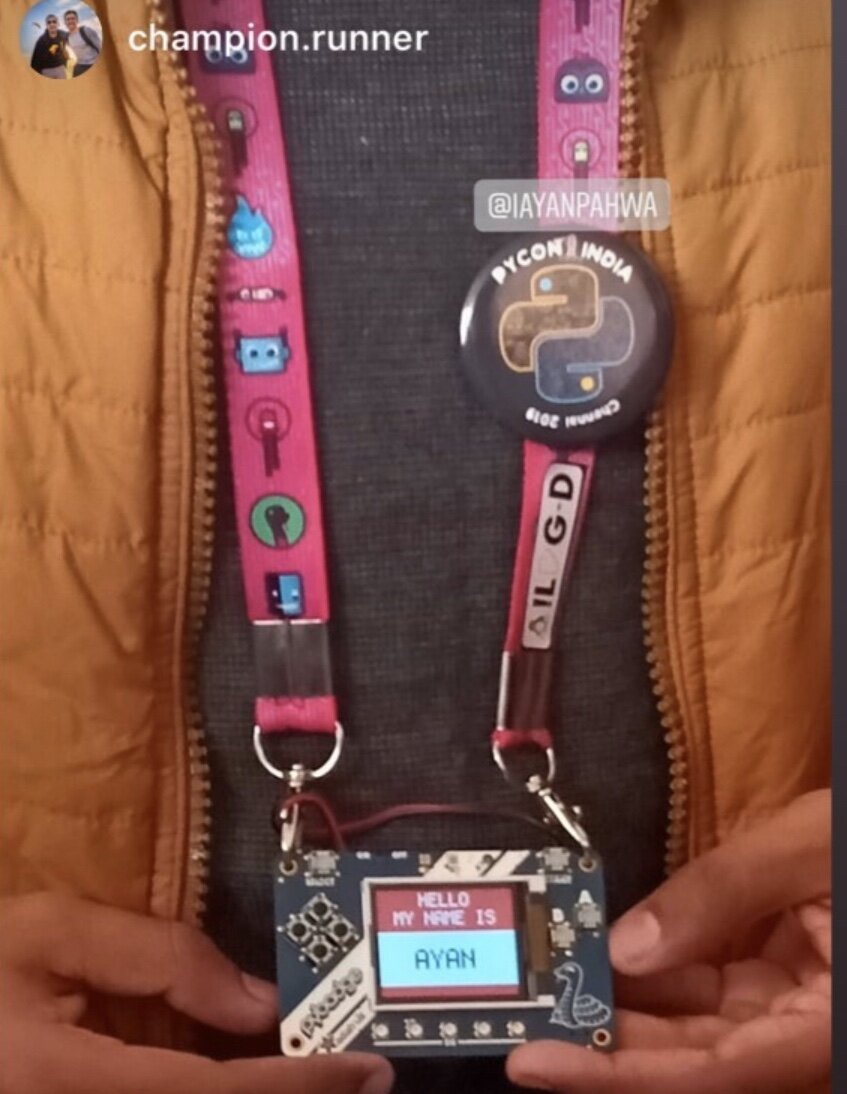
Folks interacting with my PyBadge at local meetup
I’ve seen some projects online especially by Erin St. Blaine and Nina Zakharenko, where they’ve added neopixels on the lanyard of the badge to spice it up or broadcast your conference social battery status, such as if LEDs shows RED, you’re not available to socialize and if LEDs shows green, you’re looking to interact with folks and more like that. This can be a great way to navigate around conference and can be adopted as a soft standard. Just like the Processing Day event yesterday where folks from art, design, science and technology background were present each one assigned a shape on their badge- circle for tech, triangle for science etc and my PyBadge was screaming MAKER xD.
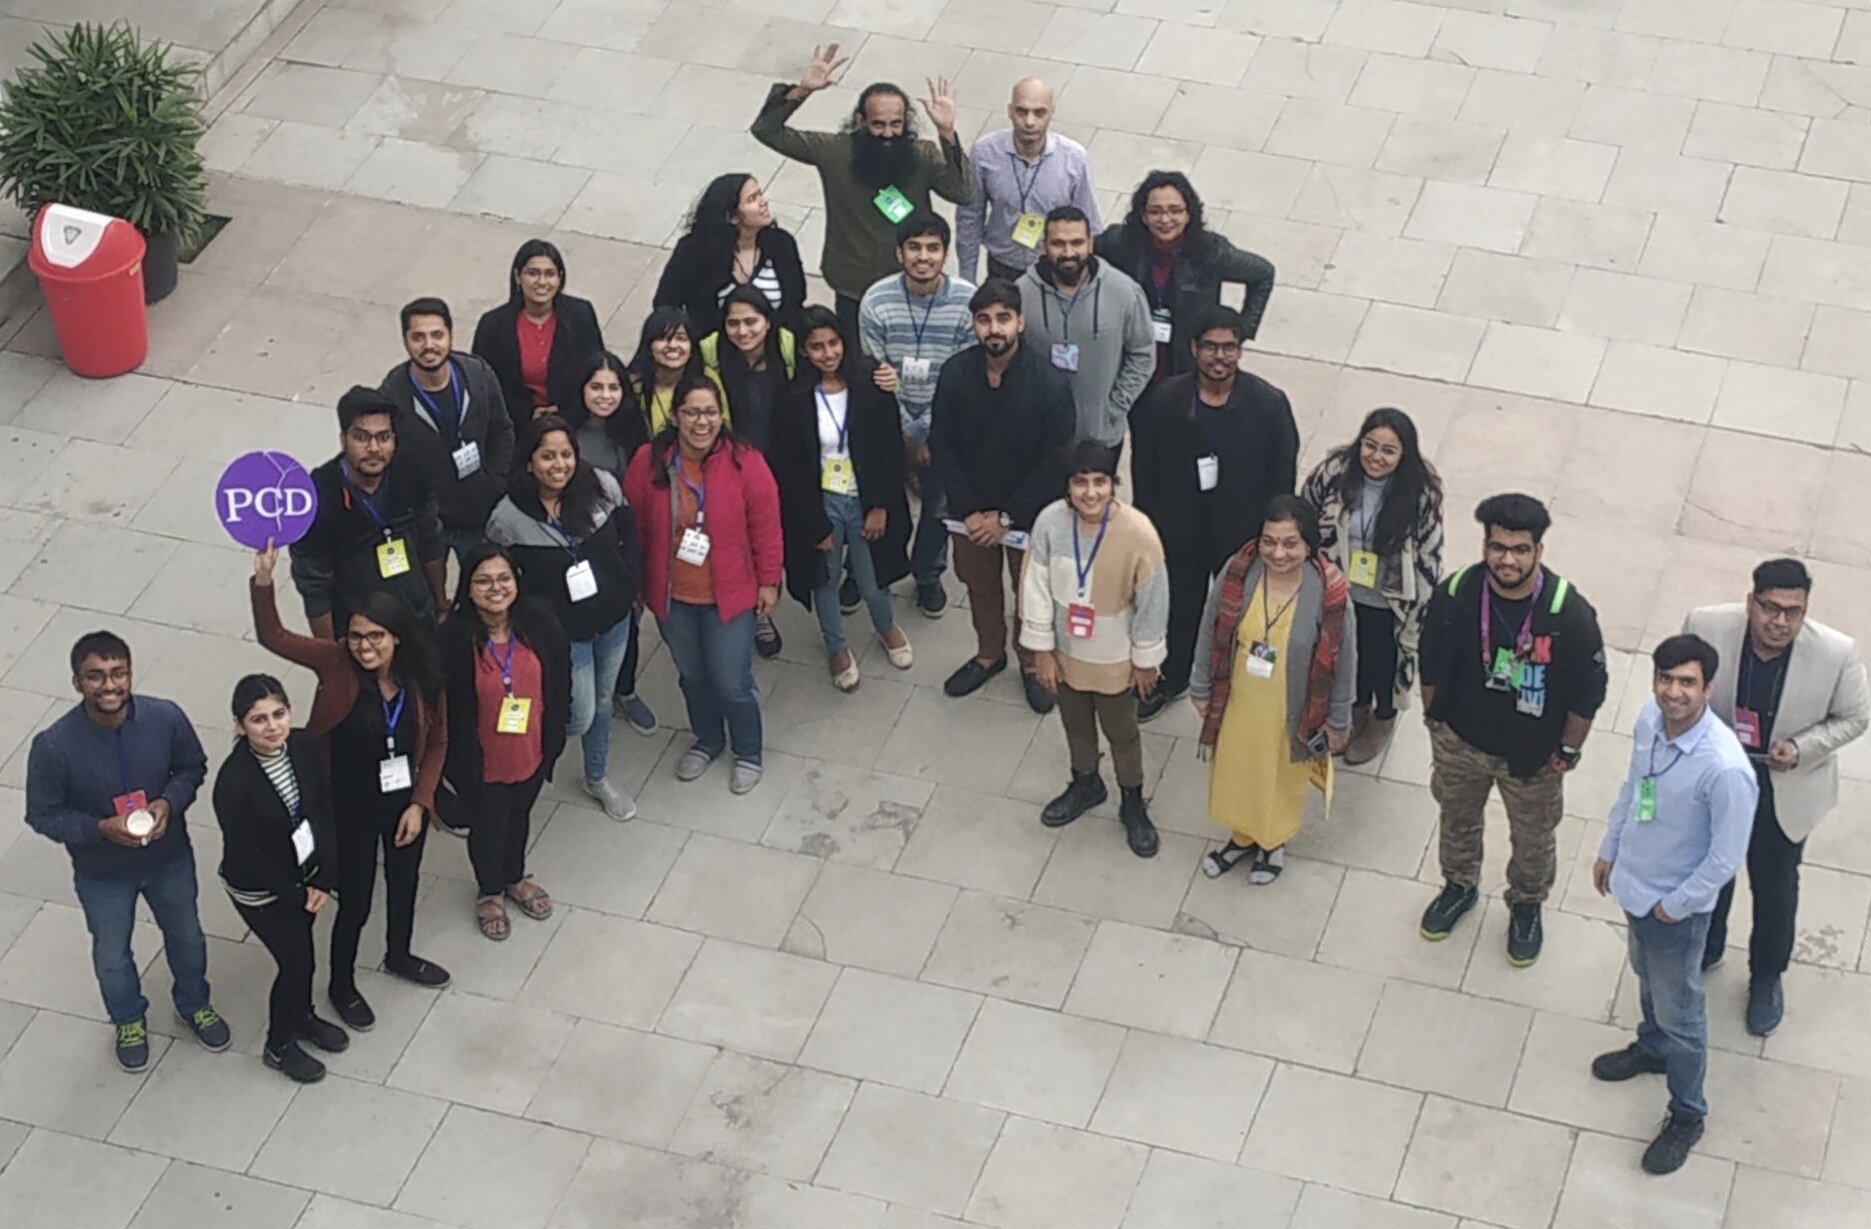
Shot from Processing Day Delhi, P.S I am the one with PyBadge xD
The idea is fairly simple, make PyBadge subscribe to a topic over MQTT to listen for name string and RGB values, make a dashboard to send these values and display them on the PyBadge. I quickly tested basic WiFi setup, basic HTTP using adafruit learn guide example. Then I tested basic MQTT subscribe example to display received string on the console using public MQTT broker sandbox by Eclipse IoT and MQTTLens as my test tool. Everything worked great, now I just needed a platform to create my dashboard. There are a few options but I decided to go with Adafruit IO since it has a name string and color picker widget and it’s free and secure to use.
That’s how my dashboard looks:

I documented the progress with this project on twitter.
The string widget has some sort of bug, so we can’t really type and send on the dashboard itself rather have to go to feeds and manually sent a data, though the RGB color picker worked well.
If you want to learn more about adafruit.io usage you can read this guide here.
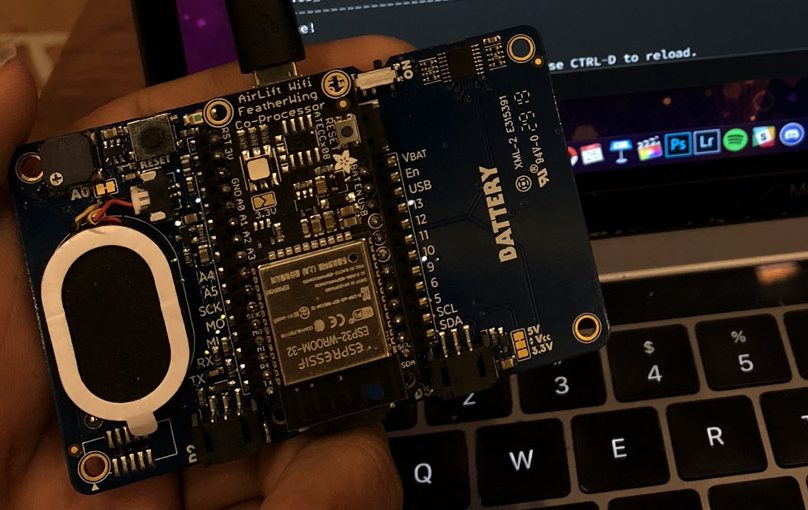
On the hardware side it was simply my pybadge with airlift featherwing attached on the pin headers at the back.
The code is neat, straight-forward and well commented, hosted on my github. If you want to use it as it is, you just need to change values of your router’s SSID, Password, API Key and broker address in secrets.py file which is another neat way to manage sensitive data in CircuitPython in a different file from your main code. You will also need to add some libraries to you /lib directory to use ESP32 and MQTT, all the information is available on the project README.
secrets = {
    # Replace xxx with your router's credentials and api keys of service
    'ssid' : 'xxxxxxxx',
    'password' : 'xxxxxxxx',
    'timezone' : "America/Los_Angeles",
    'aio_username' : 'xxxx',
    'aio_key' : 'xxxxxxxxxx',
    }
Here’s the video of it working in the wild.
Update: v2
Added a side neopixel LED on the lanyard